


Among the thousands of reviews, a search yields just a few responses for ATOTO, and all say the device does not work with that model. That is incorrect. I installed one today and it works well. I used the ASWC-1 in a Honda 2006 CR-V. I had connected to the wrong pin, but their support helped me out. The image in the ASWC vehicle-specific document shows a harness from the wire side ... pin three from the top left of the harness is correct.
For the ATOTO A6, one needs to use the female connector included with this device, and connect the brown and brown striped wires to the corresponding KEY wires on the ATOTO A6 harness. The device has a female port, but the fellow on support said it would not work. True enough, when I hardwired the connections to the KEY wires.
The ATOTO A6 is not recognized automatically by this device. I had to custom program the ASWC to radio type #8 (turn the car on, hold the volume down after 3 seconds until the LED shows red, then volume up 8 times, then volume down until the LED shows solid red). I could then program the keys to do as I wish.
I then had to bury the device behind the console in the reinstall. If the battery is replaced, I will need to reprogram the ASWC-1. I can't see it, and didn't want it dangling, so I will need to take the ATOTO A6 out again too see the LED. I'd suggest the programming phase include an audible beep, so that the ASWC-1 could be programmed without seeing the unit.
This unit automatically programmed itself and all the buttons work flawlessly except my factory buttons for "Next Preset" were set to "Seek Up" and "Seek Down." So Sirius XM would go from 101 then 102 then 103 etc. or the next frequency on the FM dial - If I was on 95.5 it would then select 95.7 then 95.9 as it will not jump up to 98.9 as the next preset in line.
After waiting on hold for 10 minutes the first time and hanging up, I waited 27 minutes the second time until I finally got to speak with a CSR. He explained that if the radio remote does not have a "next preset" feature, then you couldn't program the unit to do that either. Luckily, my new Pioneer DOES have that option on the remote so I read the instructions about 8 times until I finally understood how to "Remap" the buttons (custom program them.)
It took me 3 or 4 tries to get it right (due to crappy instructions) but in the end, I got the "next preset" working exactly like my factory radio used to do. I will attempt to layout in simpler instructions how to setup the buttons for the ASWC-1. The instructions are on page 16 and chart for buttons is on 19 of the manual.
For other preset options, reference the chart on page 19. Keep in mind, you must go in order of the chart. To skip any # you don't want programmed, press the "Volume Up" button to go to then next number on the chart. Good luck and GodSpeed!
1) Make sure the ASWC-1 is visible so you can see the LED.
2) Turn radio off.
3) Turn ignition on.
4) Immediately press the "Volume Up" on the steering wheel for 20 seconds until GREEN light comes on. (Instructions say red.)
5) Release button. (Green LED will go out.) - This is #1 on the chart on page 19. So you just reprogrammed "Volume Up" again.
6) #2 on the Chart is "Volume Down" so Press "Volume Down" on the wheel for about 1 second until you see green light, then let go.
7) #3 on the Chart says "Seek Up" which I wanted to skip, so to bypass #3 on the list, you press "Volume Up" for 1 second until you see green LED, then let go.
8) #4 on the chart says "Seek Down" Which I also bypassed by pressing the "Volume Up" button for 1 second, seeing green LED, and letting go.
9) #5 is "Source" - So I pressed the source key on my steering wheel for 1 second until I saw the Green LED, then let go.
10) #6 on chart is "Mute" so skipped by pressing "Volume Up" for 1 second and letting go.
11) #7 on chart is "Preset Up" so pressed Preset up on my wheel for 1 second, saw green LED and let go.
12) #8 on chart is "Preset Down" so press Preset down on my wheel for 1 second, see green LED and let go.
13) All my buttons were done now so to exit, press "Volume Up" for 10 seconds until Green LED goes out.
Finished! I hope this helps some of you.
I upgraded the product from 3 to 4 stars due to working properly but did not go to 5 stars due to poor CSR and instructions.
I thought this was going to be a lot more involved as far as installation. 2005 silverado..with jvc stereo. Looks like a lot of work being that there are like 12 wires. I believe I only needed to use 4. One for constant power. One for switched power. One for ground. And one that goes to the orange (for this model) I soldered the ground, the 2 power wires, and the pink to orange (for silverado). Then after, you plug the wire with the 3.5 mm connector directly into the head unit. Their website will tell you which communication wire to use, in my case pink, and the wire to connect to, In my case orange.
The website had an actual photo of my connector in the dash, with an arrow pointing to the pin position of the orange wire to connect to. You will also want to download the .pdf that shows the led codes, and some troubleshooting options. Programming is fairly straight forward...turn the key to acc. position, push the reset button on the little " brain" box and watch the flashing led. If connected correctly, the 1st series of flashes tell you which communication wire that's connected (in my case pink). The 2nd series tells what stereo it is finding. If the stereo indicator is correct, push the volume up button..if the volume goes up, you're finished. In my case, it kept saying I had a kenwood head but mine is jvc..that's basically an error code telling you it's not finding your stereo. With jvc, instead of direct connecting the 3.5mm connector directly to the head unit, you have to hardwire a female 3.5 adapter (supplied) to the head unit, and that's what you plug into. After that it worked perfect. There is also an extra green wire supplied that is used to connect the head unit to the parking brake system so when the parking brake is engaged, you can watch DVD, or YouTube or whatever video you choose if your head unit allows. This to insure that the video can only be played while not in motion. Overall it been a great purchase, it's nice to be able to use my steering wheel controls again. As laborious or time consuming as it sounds, the installation really is quite easy.
Was a bit confusing. It wanted me to attach it to a blue wire with a red strip..... Well..... Obviously Ford likes blue wires with red stripes as there was 3 behind the radio. One was an unused pin on the factory speaker harness the other was on what I guess was the connector for the old rear seat audio panel the last wire was bundled in a harness running behind the radio to an unknown box behind the glove box. I assumed it wasn't the one in the harness just passing through. I first tried the one on the speaker wire harness and it didn't work, I then tried the wire on the rear audio control harness and the steering wheel controls started working.
mine started malfunctioning after about 5 months. when pressing the volume down or up it will occasionally change to the next song. i disassembled and removed the wire tap used to connect this to the wire on the factory harness for the steering wheel controls and directly spliced it together for better connection and no more issues yet...... Issues reappeared next day and after a month of coping and ignoring the issue I revisited it. I researched how to open the steering wheel and went to the scrap yard and found some button modules in good shape and replaced my control buttons on my 03 expedition which is easy if your brave enough to handle the air bag as it must be detached, be very careful of the air bag. Disconnect battery and let vehicle sit for 30min to deenergise the computer modules prior to touching anything that has anything to do with the airbag systems. After replacing the buttons all is well for 3days and ticking. If your having issues I'd still start with making sure your wire job is good then suspect the button modules on you vehicle.
3 days was all i got out of the fix, buttons have been acting up constantly. this thing is becoming more work than its worth. I contacted support for help before the warranty expires and am waiting on a reply. all wires soldered for best conductivity, has its own ground (doesn't share same ground as headunit). firmware up to date on ASWC-1 and headunit. vehicle doesn't exhibit any other issues that would lead me to believe it is a factory wiring issue. all other buttons on steering wheel for cruise and AC work perfectly with absolutely no issues so im sure its my ASWC-1 malfunctioning. it started acting up in late spring so i wonder if it couldn't handle Texas heat?
The aswc-1 is the best at what it does. That is, there is no better steering wheel controls wiring kit that works on as many cars and radios. There is no other kit (that I know of) that can be manually programmed to essentially work with any radio. I was even able to get this working on my Chinese Android radio, the Atoto A6 Pro. (no small task). For that reason, I give it an overall 4 stars.
If you have an obscure radio (or some Chinese Android radio) this is the wiring kit you need.
If you have a common radio (kenwood, pioneer, etc.) and a common car the aswc-1 works really well. With it's manual radio detection, it will find your radio by itself. However, trouble-shooting can be VERY difficult if things don’t automatically work. (that’s the reason for the 4 stars).
**HOW TO CONNECT TO THE ATOTO A6**
*DO NOT use the 3.5mm Female input (SWC IR-WIRELESS Steering Wheel Key Control Port) on the back of the Atoto A6 Pro.
This port does not work for some reason.
1. Download the vehicle specific instructions for your car, as well as the "Axxess Steering Wheel Control Interface Installation Manual" from axxessinterfaces(dot com).
2. Follow the vehicle specific instructions to first connect the AWSC-1 to your car.
**Connections to the Radio**
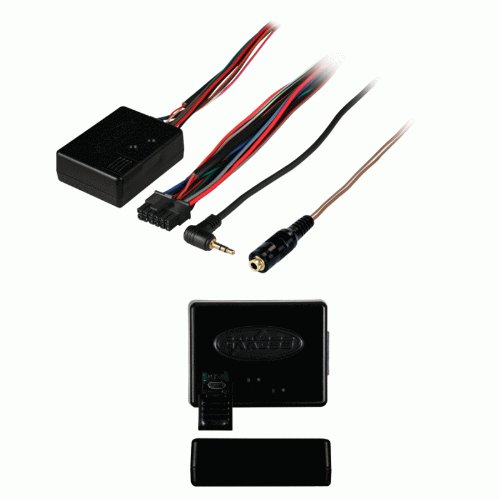
1. The ASWC-1 includes a female 3.5mm connector with a brown and brown/white wire coming out. Use this to connect to the Atoto’s Steering Wheel Key(+) and Steering Wheel Key#(+) wires.
2. Connect the "Steering Wheel Key+” wire of the Atoto A6 to the Brown/White wire of Axxess ASWC-1, connect the "Steering WheelKey#+” wire of the Atoto A6 to the Brown wire of Axxess ASWC-1
3. Plug the male 3.5 mm jack FROM THE ASWC-1, into the female 3.5 mm jack that you wired up in step 2.
4. The ASWC-1 will not auto detect the Atoto A6. (no problem)
5. Follow the instructions from page 12 of the "Axxess Steering Wheel Control Interface Installation Manual" to change your radio type.
6. The Atoto A6 will respond to "Visteon" radio controls. (Visteon is radio type 8).
7. Once you've set the aswc-1, go to your radio.
8. From the radio navigate to: Settings>Default settings>Steering wheel program.
9. Once at the screen press "Reset".
10. Then press any key value, it will begin to flash.
11. Finally press one of the buttons on your steering wheel, the flashing on your radio will stop and a triangular symbol will appear on the key. this indicates the key means has been successfully programmed.
repeat steps 10 and 11 until you have programed all the steering wheel control buttons.

Feature Product
- One interface does it all - No additional interface needed
- Designed to be compatible with all major radio brands
- Auto detects vehicle type, radio connection, and presets controls
- Ability to dual assign steering wheel control buttons
- Can be manually programmed for most vehicles. Provides Speed Dependent Volume Control on select CAN data vehicles
Description
One interface does it all. No additional interface needed. Pioneer/Kenwood/Eclipse – no problem as the ASWC-1 works with them all plus many more radio manufacturers. Auto detects(*) the majority of vehicles on the market today and programs the steering wheel controls automatically. Auto detects(*) what radio the ASWC-1 is connected to. Updateable via a common micro B USB cable to ensure you have the most up to date inventory. (*)US Patent No.8257147
coming up on two years of use. continues to work as advertised. installation went as directed.
only issue has been on two or three rare occasions over the 2yrs, it has been necessary to turn off the ignition on the car and wait a moment before turning it back on in order to get the interface to initialize properly. not going to hold that against anyone as it's only happened a couple times in two yrs, and i for one understand that i'm basically hacking a factory computer to make it do something the way i want to and i know that'll have its issues every now and then
2011 jeep and 2005 Chrysler 300 works great! picture is setup for the Jeep
This unit worked well with our 2009 RAV4 and the aftermarket Pioneer AVH-W4400NEX head unit. Initially, I ran into issues when quickly reading over the instructions and not wiring it 100% correct. However, after reading the instructions VERY carefully, I discovered that TWO wires needed ran to the ground, NOT just the one black wire. After doing this, it worked perfectly.
My advice on purchasing this unit is to either (A) VERY carefully read over the instructions and TAKE YOUR TIME to do in ONE - STEP - AT - A - TIME, or (B) have it installed by a pro who does this stuff for a living. It is very doable for the DIY kinda guy but take your time.
I'd also like to add that Metra has a great resource online for making sure you select your EXACT year, make and model to get your specialized instructions of what exactly to do. Our vehicle self-programmed once plugged up, and while some others require a button press or 2, it will walk you right through it.
Great unit at a fair price.
I've had one of these in a '10 Forester for about 18 months, and just put a 2nd into an '11 Tacoma, both with Alpine HD149BT head units. I don't recall if the Forester required any kind of programming (I don't think it did, or if it did, it might have been because I bought an open box and it had needed to be reset) but on the Tacoma, I didn't even leave it visible- just followed the 'auto sensing' instructions, turned the ignition on and left it on for about 45 seconds without touching anything, then turned it off. Fired the truck up, and all the buttons worked! A+ for execution, at least on my Japanese vehicles & head units.
Only place I found lacking was instructions. Even with vehicle-specific ones from their website it's not crystal clear, although after staring and re-reading them a few times before snipping wires in my dash (as much as I'd love to leave OE connectors in place and have a ready-made harness, it doesn't seem always possible or economical in this case) they got the job done OK. FYI, I've used bare butt connectors and heatshrink tube on both of mine, as I use on pretty much everything automotive- maybe solder would be better, maybe not, I don't know if wire taps (shudder) or twisted and taped connections would suffice, but I can say I've had no issues with my method.
I had great concerns about how much work it would be to configure this product to work in my 2008 Suzuki Grand Vitara (Luxury trim). I’m tech savvy enough to program Harmony remote controls so I figured I would up to the challenge, but dreaded the likely frustrations of learning this new skill set. I was apprehensive, but somewhat excited when I opened the product and learned that the ASWC-1Steering Wheel Control Interface would automatically configure for my application.
The application notes for my car told me that I needed to use pins 19 and 20 on the factory radio wiring harness to support ASWC-1Steering Wheel Control Interface, but failed to warn me that those pins are blank on the available wiring harnesses sold by both CarXtc and Metra.
I tried to contact CarXtc, the seller and presumed manufacturer for the harness I had purchased on Amazon through their customer support number and was stuck in what seemed to be an endless loop for aggressive recorded solicitations for various unrelated products which I fought off only to end with a message that the phone number I had called was changed to another number and that I needed to call that new number instead. I called the new number and was again stuck in what seemed to be an endless loop for aggressive recorded solicitations for various unrelated products. I gave up on the customer support line. I will NEVER by anything from CarXtc ever again.
Instead I went to BestBuy and talked to one of their installers who sold me two Metra Part Number 70-1721 wiring harness. He then extracted two pins from one harness and inserted them with a little adhesive into the previously blank pin 19 and 20 locations on the other harness. I then had the completely usable harness I needed. I tipped him $20 for doing me a solid and went back home and finished my installation.
I hooked everything up. The ASWC-1Steering Wheel Control Interface did its thing and everything worked exactly like it should immediately. I was relieved not to have to configure the device myself.
0 comments:
Post a Comment